The German Mecca of precision watchmaking
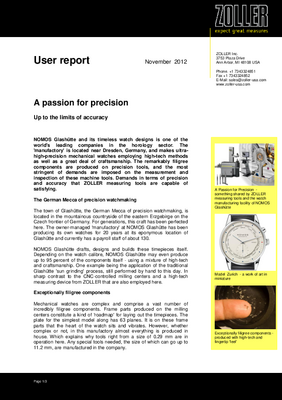
The town of Glashütte, the German Mecca of precision watchmaking, is located in the mountainous countryside of the eastern Erzgebirge on the Czech frontier of Germany. For generations, this craft has been being perfected here. The owner-managed 'manufactory' at NOMOS Glashütte has been producing its own watches for 20 years at its eponymous location of Glashütte and currently has a payroll staff of about 130. NOMOS Glashütte drafts, designs and builds these timepieces itself. Depending on the watch calibre, NOMOS Glashütte may even produce up to 95 percent of the components itself - using a mixture of high-tech and craftsmanship. One example being the application of the traditional Glashütte 'sun grinding' process, still performed by hand to this day. In sharp contrast to the CNC-controlled milling centres and a high-tech measuring device from ZOLLER that are also employed here.
Exceptionally filigree components
Mechanical watches are complex and comprise a vast number of incredibly filigree components. Frame parts produced on the milling centers constitute a kind of 'roadmap' for laying out the timepieces. The plate for the simplest model along has 63 planes. It is on these frame parts that the heart of the watch sits and vibrates. However, whether complex or not, in this manufactory almost everything is produced in house. Which explains why tools right from a size of 0.29 mm are in operation here. Any special tools needed, the size of which can go up to 11.2 mm, are manufactured in the company.
True precision is the goal
Nothing less than optimally tested and inspected tools can act as the guarantors of high quality. The paramount requirement for a measuring device is therefore maximum precision to enable the levels of accuracy demanded in the production of a mechanical watch to be achieved. "With the »smarTcheck« universal measuring device acquired barely one year ago we have broken through into a new dimension in this respect", states Frank Höhnel, a technology expert at NOMOS Glashütte. Until the new »smarTcheck« arrived, we had been working with a 10-year old manual ZOLLER »smile« device, but this was no longer up to the task of meeting the increasingly tough requirements on speed and precision, nor to the task of 'Goods Receipt' – the »smile« only covered tool preparation for the machine. At times, tools were measured in the machine by laser. "Here we had been getting excessively large variances despite the fact that the tool is as accurately clamped as it is during the machining process", states Dirk Wenzel, a user of the system at NOMOS Glashütte.
Quality control right from goods receipt
Further to the expansion of mechanical production, a solution needed to be found to inspect all bought-in tools on receipt and we also needed to have a way of measuring the special tools that we produce ourselves. A key aspect of this was the improvement in quality of the tools employed. The goods receipt inspection is the first building block in our quality assurance procedure – because without tools that are made perfectly for their intended task, we cannot use them to make precision components. The specified levels of accuracy lie in the region of 4 microns.
Process reliability assured
Advantages from which the company benefits since it started using the ZOLLER »smarTcheck« universal measuring device include, first and foremost, a saving in term, combined with gains in terms of reliability and 'zero defect' standards, all of this being the view of Frank Höhnel: "The uncertainty factor - the human operator - is excluded from this, data are transferred with zero defects and there are no rotating numbers any more – something that used to cause machines to crash in the past", says user Dirk Wenzel. Process reliablity is assured. An important aspect of this is the absolute cleanliness and precision on the measuring device. Every two hours, the device is therefore calibrated - a fully automatic process.
Two names that stand for (German) precision
In response to the question as to why the company decided in favor of ZOLLER, Frank Höhnel has this to say: "The primary reason that prompted our decision for the Zoller device was the high level of accuracy it achieves". The many long years of good collaboration also had a role to play and ZOLLER offers an on-site service that keeps the measuring device maintained and calibrated on a regular basis.
However, the main argument is that ZOLLER performs measurements in accordance with cutting-edge standards – there simply is no higher standard of precision than this. And nothing less than that is what production of ultra-high quality watches demands at the NOMOS Glashütte manufactory.
Universal measuring machine »smarTcheck«: checking and logging tools efficiently
The high-performance universal measuring machine known as »smarTcheck« is an all-rounder for the efficient inspection of tools. Equipped with both, incident and transmitted light, it can also be used for measuring tools before and after sharpening. This makes it a simple task, at a single mouse click, to check, measure and log axial and radial tool geometries. The »smarTcheck« is based on a modular design which means it is quick and inexpensive to adapt to suit individual requirements. Whether as a manual or as a CNC-controlled version, with the ZOLLER- »pilot 3.0« software, cutting radii, angles, lengths and diameters can be measured fully automatically and at the touch of a button. „high-resolution optics employed in conjunction with special ZOLLER lighting enable cutting surfaces to be represented superbly under incident light. The »smarTcheck« enables quick checks to be made in tool quality control and in the setting operation on the CNC version. These checks are fully automatic and infinitely repeatable measuring sequences with automatic test log. The unit also offers an extensive range of statistics and reporting functions.


